
![]()
Sometimes it may be necessary to make a set of images darker or lighter, more or less contrasty, or otherwise change their appearance but retain their relative appearance. Lightroom has the ability to make relative adjustments on a selected set of images to facilitate that.
Look at the following images, for instance. They convey the same look and feel although they required slightly or significantly different adjustments to look that way. The Basic adjustments panels for each are below the images.
![]()
![]()
![]()
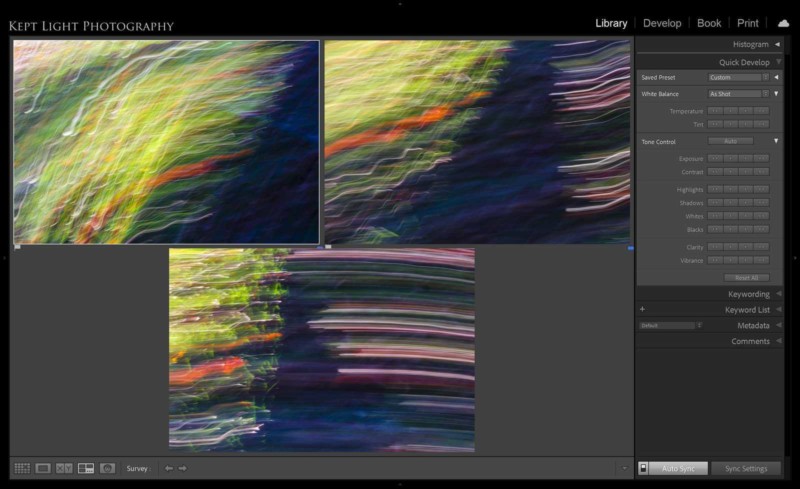
The relative adjustments are available in the Grid or Survey modes. I used the Survey mode by pressing the letter N after selecting all three images. Now, only they are visible and a good deal larger than the thumbnails I would have gotten in the grid view. Here is the Survey Mode screen with the images selected.
![]()
![]()
![]()
Note that the Auto Sync is turned on, see lower right of the image. That will carry the adjustments made to one image to the other selected ones. The relative adjustment controls are under the tab Quick Develop. Instead of the sliders of the develop module, here we have single and double arrows for increasing or decreasing the adjustments. Whatever adjustments we make here will be adjusted relative to their current settings for all the selected images.
The single right and left arrows take small steps and the double arrows make bigger jumps. The amount of these vary. In the case of exposure adjustment, the single arrows increase or decrease the exposure in increments of a third of a stop, 0.33; and, the double arrows make full stop adjustments.
For all the other adjustment sliders, this works in units of 5 and 20 when adjusted with single and double arrows respectively. And, all the adjustments are added to or subtracted from the existing level of each develop-module slider.
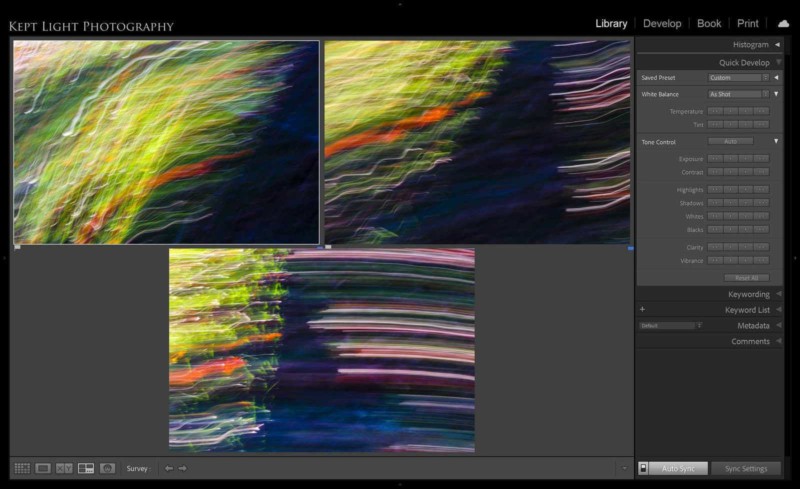
Making the adjustments involves clicking on the arrows, up or down until the desired look is achieved without worrying about remembering the increment of adjustment done on one image and trying to replicate the same on the other images. The changes are easily visible on the images as you click on the arrows. Here are the same set of photographs after the adjustments I made to all with the Basic panel captures for each below them.
![]()
![]()
![]()
Now, if you have multiple photographs from the same scene, of the same subject that you adjusted to present the same look and feel, you can alter them simultaneously for a new and better look. Also, keep in mind that selecting the images in the develop module and moving the sliders there does not accomplish this as those are absolute adjustments and will result in the sliders being at the same spots and the images will not look the same if they had different adjustments applied to them.
Here is a comparison of before and after Survey Mode screens.




Ending 2020, Welcome 2021
This article will be my last one of 2020 and it has many “before-after” comparisons. We are all looking forward to a much improved “after” state in 2021 as we leave 2020 behind.
A very happy holiday season and a happy new year.
May 2021 bring health and happiness to everyone.
And, let us remember those who suffered or were taken by the virus.
![]()
![]()
![]()
About the author: A. Cemal Ekin is a photographer based in Warwick, Rhode Island who has been shooting for roughly 60 years. The opinions expressed in this article are solely those of the author. Ekin retired as a professor of marketing emeritus from Providence College in 2012 after 36 years of service there. Visit his website here. This article was also published here.

