I’m amazed how much power and functionality is packed into modern camera apps. My iPhone’s camera has all but replaced my big digital camera and pack full of lenses, partly because it’s with me all the time, but also because it’s so darn good.
Most of the time, taking a photo is just a case of firing up the app and pressing the shutter button. But there hidden in the app are some really awesome features that you might have missed.
So, fire up your iPhone’s Camera app, and let me show you.
Must read: iOS 14 pro tip: One setting change for better photos
See that little triangle pointing up at the top? Tap on it.
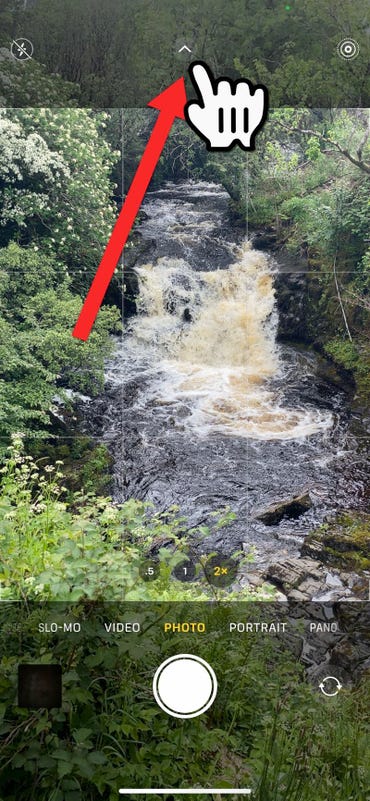
Tap on the little triangle!

That will unveil a whole array of tools at the bottom on the screen!
Note that you can also swipe up from the middle of the screen to access these tools.
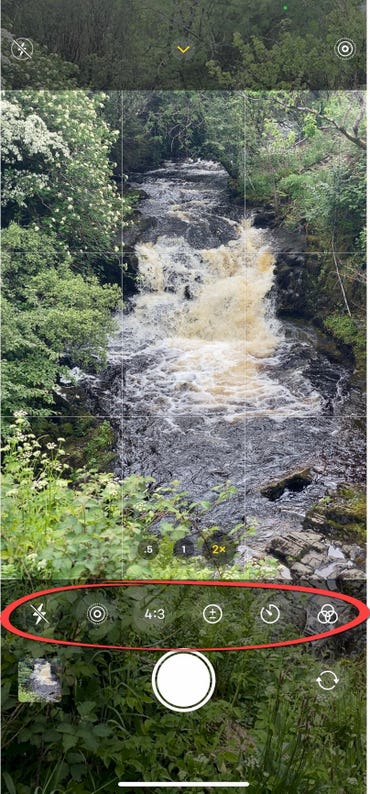
Loads of photography tools you might have never seen!

From left to right, these tools are:
- Flash on/off
- Live Photo on/off
- Aspect Ratio
- Exposure (only present on the iPhone XR and above)
- Timer
- Filters
Click Exposure, and you’ll find a slider at the bottom that allows you to increase or decrease the exposure of the image.
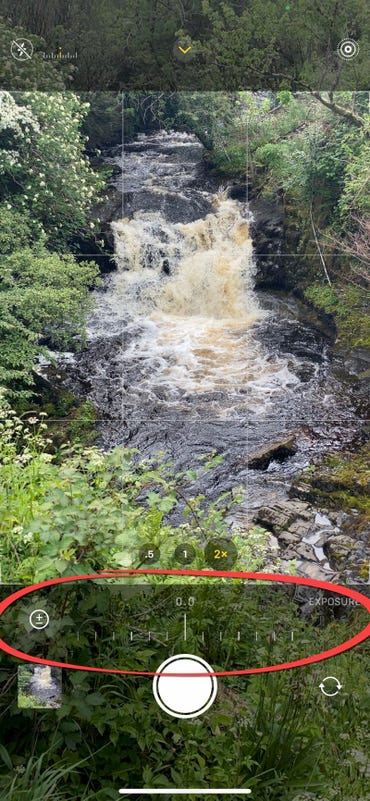
Exposure

At the top-left of the screen, there’s a histogram that will show you if parts of the image are underexposed (red on the left of the histogram)…
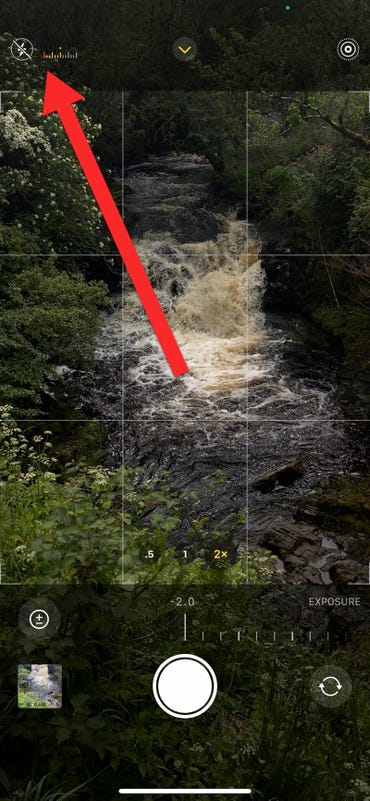
Underexposed image

… or overexposed (red on the right of the histogram).
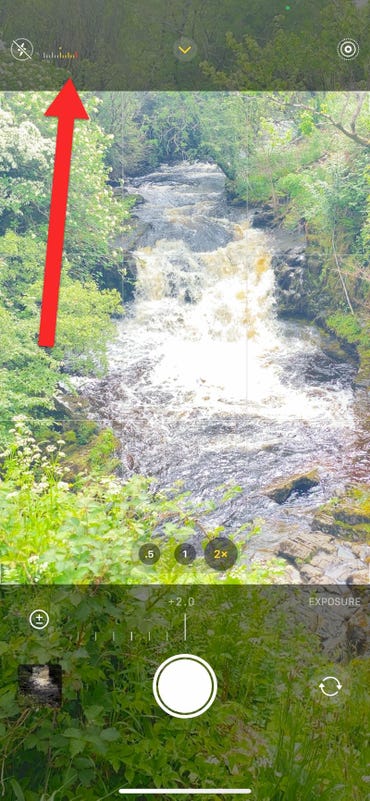
Overexposed image

The Aspect Ratio setting allows you to switch between common aspect ratios, .
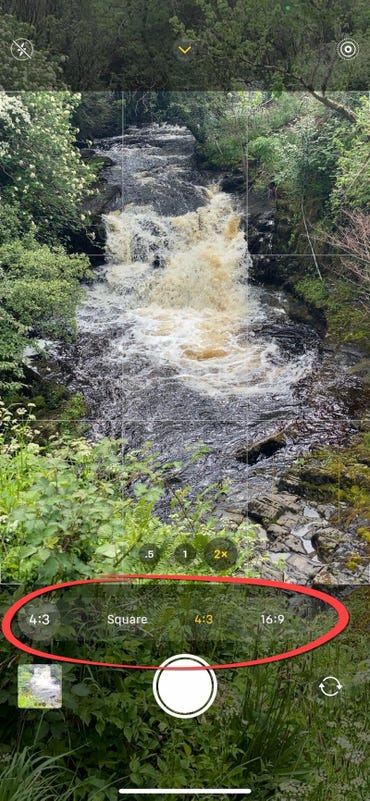
Aspect Ratio

The Timer feature allows you to have a delay of 3- or 10-seconds before the shot is taken. Great for group shots!
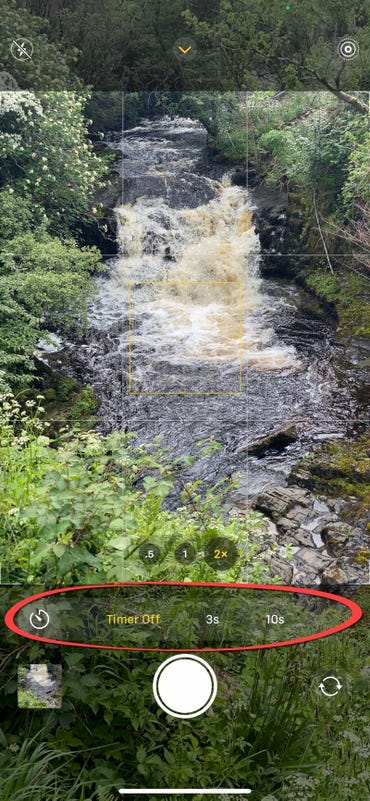
Timer

The Filters button gives you access to an array of filters, and you can see their effect in real-time.
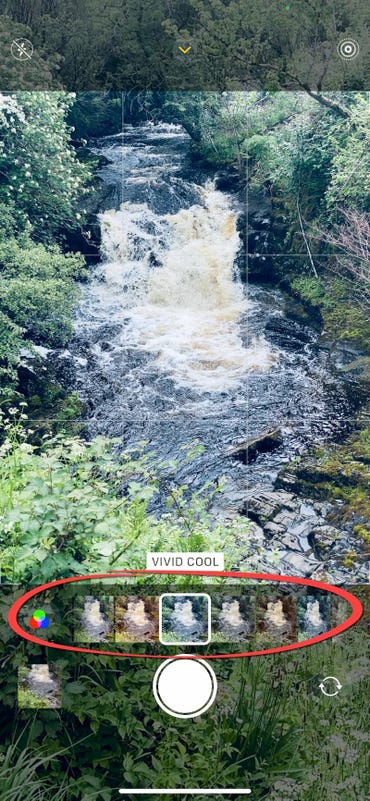
Filters

Let me show you one final feature that I just love, and use a lot. This is the effects you can add to Live Photos.
Take this Live Photo of a waterfall.
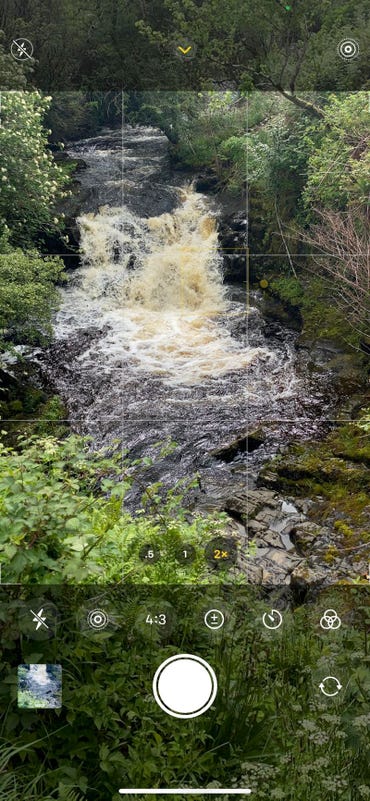
Pretty bland and boring

Pretty boring. But if I go to Photos, find the image I want to edit, and then swipe up in it, I get access to three effects that I can add:
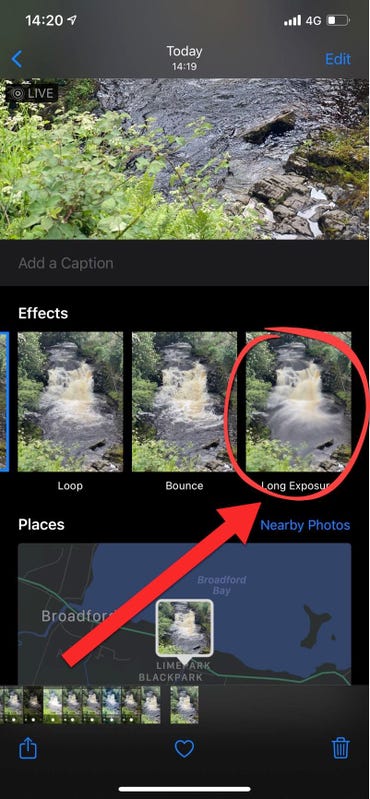
Live Photo effects

Loop and Bounce create short videos, but Long Exposure creates a smoothed-out long exposure effect that was once only possible with high-end cameras.
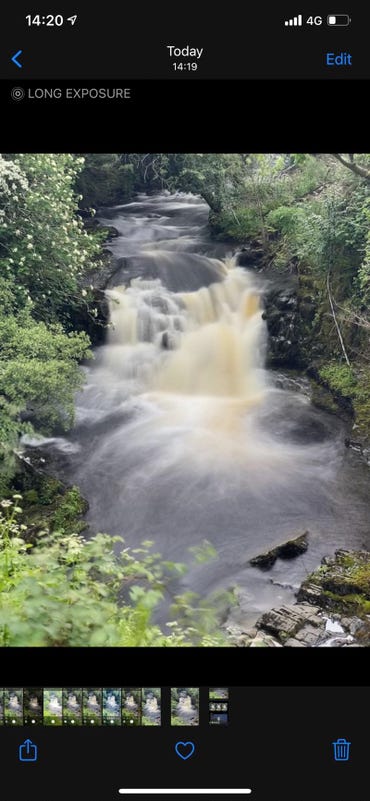
Much better!

Have fun!

