![]()
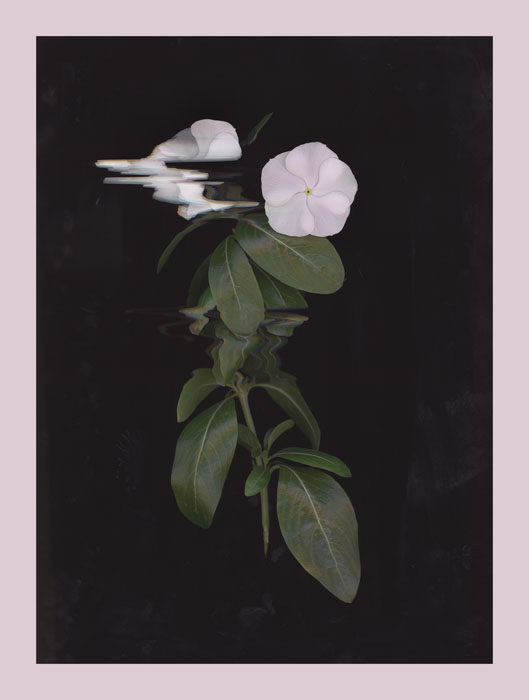
I took this flower photo without a camera. It was my first experiment in scanner photography.
I have worked in a variety of photographic media — everything from 16mm film, to 4×5 film, right up to collodion wet plate! Yet, digital photography had always been something I’ve done with a DSLR or mirrorless camera. My experimentation with alternative or obscure processes had remained in the analog realm for the longest time – still, attempting anything but “straight photography” is fairly new to me.
A few years ago, I was able to attend the fantastic Bealart program while finishing my last years of high school – essentially university-level art education for younger students in southwestern Ontario, Canada. Fortunately (though also sadly), they are one of the few schools around here that embrace their darkroom, actively teach film photography, and even venture into experimental processes.
This is where I first discovered and worked in such processes, with wet plate being probably the most notable. In my second year, a friend and I began doing our own C-41 processing. We had a lot of resources to work with at this school, all the while local processing labs seemed to be either closing or jacking up their prices. Eventually, C-41 processing became a sort of routine for me. Most of my time is spent shooting 6×9 or 35mm color film, so do-it-yourself C-41 lends itself well to my interests.
Being in university now, I continue to take photography courses, but nothing concerning film photography exists here (in spite of the local university having the largest and best equipped darkroom in the city). Yet, I’ve invested in a lot of film photography equipment. Scanner photography seems like a natural compromise; it allows me to work in a more experimental process, stay digital, and ideally, use my large format camera with new purpose. I plan on building a scanner back for my 4×5, which I would consider the ultimate “best of both worlds” scenario – especially since I love tinkering with things!
![]()
I can’t really say I’ve imposed any idea or concept on my scanner photos — they’re simply just pictures of flowers — but it’s the medium itself that I find most fascinating: scanner photography lies in some strange middle-ground between traditional still photography and cinema. Of course, long exposures exist, but if there’s any change in the subject, it becomes blurred, and sometimes unintelligible. On the other hand, cinema is also constructed time – but with 24 images per second instead of just one.
Scanners meet somewhere between these two. They record information sequentially over time, onto a single image. What happens in one row of pixels stays in that row of pixels forever. Changes to the object a fraction of a second later are recorded, but not in place of the previous image. It’s entirely new information in that sense. I find this concept very powerful – and perhaps these photos do speak to that, but right now I just them as a “sketch”; figuring out what I’ll do for more serious work.
![]()
As far as the technical process goes, I use either a Swiss Army Knife or my hands to move the plants about over the glass surface. The exposure lengths (movement speed of the scan head) are generated by the choice of DPI – I’m sure there’s another way to do it, but with the stock V600 software, this is the best I could do. Since the CIS sensor records RGB separately, movement can be used to interesting effect when generating color scans.
![]()
For “smoother” results, you can scan in black and white. It can be hard to describe such things in words, but the following video does a great job at it:
About the author: Derek B. is a Canadian photographer who loves to experiment with new photographic processes. You can find more of his work on Flickr.

