
June Wan/ZDNet
When buying a new phone, carriers and retailers often pitch discounts in the form of trade-in offers. That is if you send in an old phone that meets the vendors’ requirements in exchange for tens to hundreds of dollars off your new one. This process has become more aggressive over the past years, with stores like AT&T now willing to sell you the latest
Samsung
Apple
device for free, as long as you trade in a functioning phone — cracked or not.
Still, trading in is not as simple as powering off your device and handing it to your local store associate. A phone that has not been properly factory reset backed up or shipped in the appropriate supplies can delay the evaluation process for your discount and, in the worst case, be deemed as ineligible for any offer. That’s why we’ve curated this guide to help you through all the steps and best practices for a burden-less trade-in experience.
Backing up your data (contacts, photos, etc.)
The first practice that you should always do when switching to a new phone is backing up the data and files on your old one. You wouldn’t want to lose all those pictures, videos, contacts, and text messages, right? For iOS or Android, the backup process is fairly straightforward, with multiple options to get the job done. Just make sure that your phone is charged up (at least 75%, ideally) so that it doesn’t power off in the middle of the transferring.
More: The best places to sell or trade your current smartphone
Backing up an iPhone via iCloud
iPhones
, I’d recommend backing up your files through iCloud, Apple’s cloud storage service. Not only will you be able to upload and download data from your Apple devices, but the service will also be available for you to peruse via the web (
iCloud.com
).
By default, Apple offers 5GB of free iCloud storage to keep your photos, contacts, notes, and more intact. If more is needed, you can opt into 50GB, 200GB, and 2TB storage plans for $0.99, $2.99, and $9.99 a month, respectively. For getting your files from one iPhone to another, I think paying for one month’s service is definitely worth the convenience.
Tip: If you’ve never subscribed to an iCloud plan, Apple will actually offer you a free, one-time trial that lets you use as much iCloud storage as you need to transfer your data onto your new iPhone. To see if you’re eligible, open up the settings app > tap General > Transfer of Reset iPhone > Get Started within the Prepare for New iPhone bubble.
Otherwise, here’s how to back up your iPhone data via iCloud:
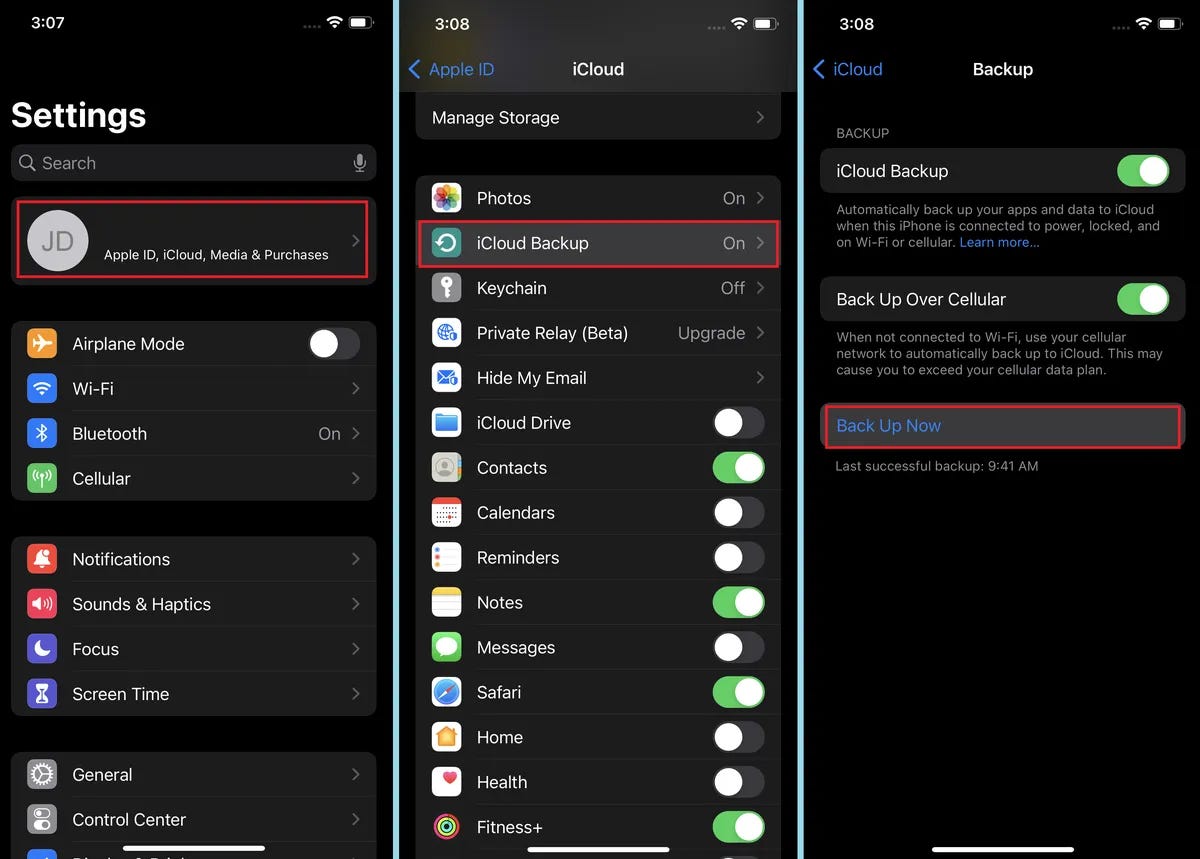
- Open up the settings app > tap into your profile tab at the top > iCloud > toggle on or off all the items that you’d like to back up.
- When you’re set, tap iCloud Backup > Back Up Now.
- The duration of the process will vary depending on how many files you’re storing in the cloud.

June Wan/ZDNet
Backing up an iPhone via iTunes (computer)
You can also backup your iPhone data onto a computer via Apple’s iTunes program (yes, it’s still active). While this method is a little more labor-intensive, it’s free, and you will have most, if not all, of your files stored locally.
First, make sure your MacOS or Windows-powered computer has iTunes installed. If not, you can
download it here
. Once installed, here’s how to back up your iPhone:
- Connect your device to your computer with a
Lightning to USB-C
USB-A
cable.
- Open the iTunes software on the computer and click the Device button at the top left. The icon shows a small iPhone.
- Now click Summary under your iPhone information > Back Up Now.
- iTunes allows you to back up text messages, call logs, contacts, photos, videos, and more. You can see what’s been backed up by clicking Edit > Preferences > Devices.
Genius Bar
will help and walk you through the backup process for your iPhone. The service is free and requires a reservation.
Backing up an Android device via Google
Like the iPhone and Apple’s iCloud, the most convenient way to backup an Android device is through Google’s cloud service, Google One. It’s built into your Android phone — whether it’s a
Samsung Galaxy
Pixel
OnePlus
— and easily accessible. The catch is that Google only offers every user 15GB of free storage, so if you’re in need of more space, you’ll have to opt into one of its
paid plans
. Pricing goes as follows: 100GB for $2 a month or $20 a year, 200GB for $3 a month or $30 a year, and 2TB for $10 a month or $100 a year.
Once you’ve decided on a plan, here’s how to initiate the backup process:
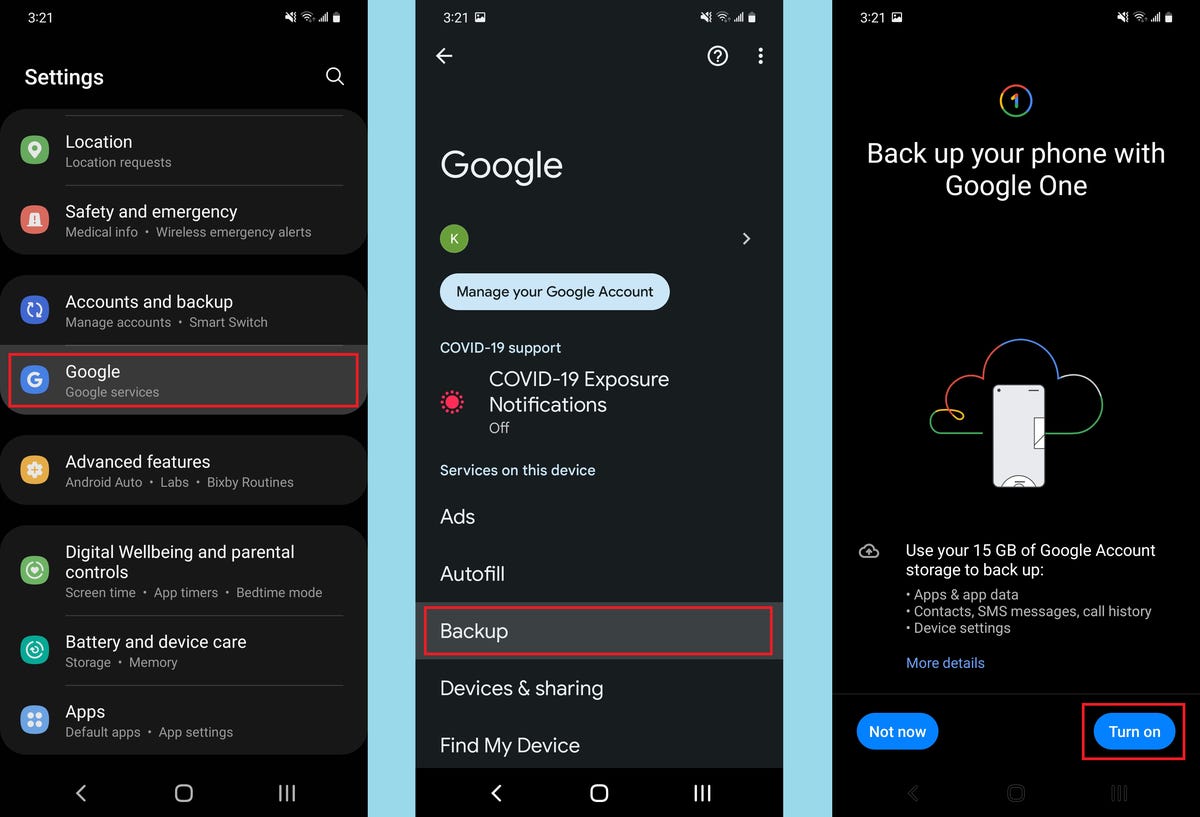
- Open up your settings > Google > scroll down and tap Backup.
- For a breakdown of your backup(s), you can download the free Google One app > tap the Storage tab under Device Backup.
- If it’s your first time doing this and you’re backing up a lot of files, the process can take up to hours. So, make sure that your phone is either charged enough or plugged into a charger.

June Wan/ZDNet
Backing up an Android device via PC (Windows)
While Android doesn’t have an iTunes alternative, you can backup your data directly onto a Windows PC or external hard drive for free. To do this:
- Connect your device to your PC with a
USB-C
MicroUSB
) to USB-A cable. You may have one already that came with your old or new phone.
- To let your computer know that you’re connecting the phone to transfer files and not just to charge it, slide down the notification panel on your phone > tap the Charging this device via USB notification > make sure File transfer is selected.
- Open up your PC’s Windows File Explorer and click on your phone’s name on the left panel.
- Now, you can copy any or all files within your phone’s folders and paste them into your PC or external hard drive.
Tip: Not every folder is named in a user-friendly manner. For example, if you’re copying over photos, you’ll want to find a folder labelled DCIM, not Camera.
Resetting your phone
Now that all of your information is safely stored, you’ll want to factory reset your phone and give it a thorough cleaning before sending it out. Follow the steps below, and your phone will be as clean of a slate as can be, with no personal data left behind.
Factory resetting an iPhone
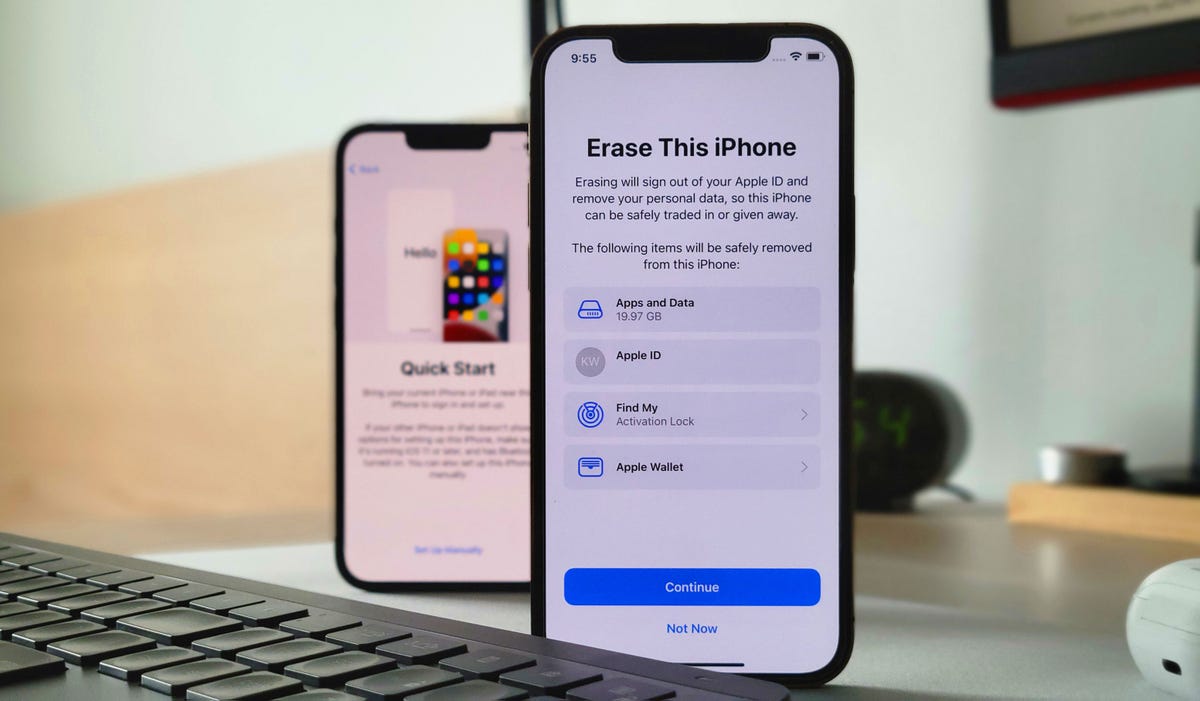
- Open your settings app > tap General > scroll down to Transfer or Reset iPhone > Erase All Content and Settings > Continue > type in your iPhone passcode to confirm the reset.
- This procedure will wipe the apps and data of your device, as well as remove your Apple ID, Find My setting, and Apple Wallet from the iPhone.

June Wan/ZDNet
Factory resetting an Android
- Accessing the factory reset settings on Android is a little more complicated as the pathway depends on what brand you’re using. However, one method that works for all manufacturer devices is to open your settings and searching “factory reset” at the top.
- If you’re on a Samsung device, open the settings > scroll down to General management > Reset > Factory data reset > Reset. You’ll then be prompted to type in your passcode.
Once your phone has fully reset itself, power it off, and remove your SIM card and case.
Also: Best green phone: Sustainable and eco-friendly phones
Shipping and handing off
If you’ve followed through all the instructions above, you’re just one last step away from trade-in bliss. Whether you’re shipping your old phone out to trade in or handing it over at a physical store, you should always, always double-check that it’s in the condition that you and the retailer agreed to.
For most trade-ins, retailers require your device to meet the following qualifications: No cracks or heavy wear, powers on and holds a charge, and is fully paid off with no past-due balances.

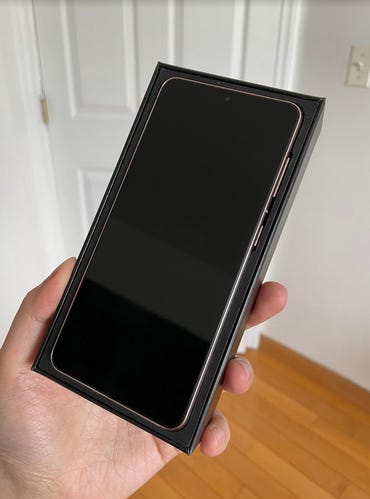
Phone boxes make for excellent packaging when trading in an old phone.
June Wan/ZDNet
When shipping any electronic device, ensure that it’s securely packed with bubble wrap, peanuts, or other layers of cushioning. If you have the original box for your phone, use it! Phone boxes are designed to keep the device snug and protected. However, most trade-in programs do not require you to pack the original charger and accessories. Lastly, it won’t hurt to mark the package with a “Fragile: Handle with Care” signage.
Tip: Before sending your old phone out, use a secondary device (or your new phone if you’ve received it) to document its condition. Take clear pictures and videos of the phone’s screen, back, cameras, ports, and it turning on and off. This step is vital because once you ship your phone out, damage during delivery and other mishaps may occur, ultimately weighing into how much money a retailer will value the device for. With proof and documentation of its previous condition, you should have no trouble denying any suspicious evaluations.
That’s it. Your phone is backed up, factory reset, and ready to be traded in.
Did you find this guide useful? Let us know by commenting down below, as well as any other tips or questions you have regarding the trade-in process.

